A mandatory holiday decoration is a cake. Many people want to amaze and surprise guests with the stunning appearance of this delicacy. Not everyone can afford to order a cake from professional pastry chefs. Then a new, stunning decoration option will come to the rescue, which even a simple housewife can handle. Mirror glaze for a cake will turn ordinary homemade cakes into a work of art and will definitely delight your guests.
Making mirror chocolate glaze at home is easy, the main thing is to approach this process correctly. Products required are ordinary and affordable.
In order for the glaze to turn out flawless, the temperature regime must be observed. Mousse cakes that need to be frozen are suitable for coating. Thanks to temperature changes: warm icing and ice cake, the coating will be smooth and even.
Ingredients:
- water – 30 ml for gelatin;
- cocoa – 80 g;
- sugar – 240 g;
- cream – 160 g, fat content 30% or more;
- molasses – 80 g;
- gelatin - package;
- water – 95 ml.
Preparation:
- Pour gelatin into a bowl and add water. Set aside.
- Pour the remaining water into the pan and add sugar.
- Add molasses, stir. Boil.
- Remove from the stove.
- Heat the cream separately.
- Mix sweet, hot water with cream.
- Mix.
- Add cocoa. Stir.
- At this time, the gelatin should become swollen. Heat. Mix.
- Pour into saucepan with cream. Mix.
- Take a high container. Pour mixture.
- Prepare the blender.
- Place in container. Beat.
- The temperature regime should be strictly followed. For the mass to be ideally distributed, 37 degrees is required. If the temperature is lower, it should be heated, if the temperature is higher, it should be cooled.
Color mixture for decoration
Try making the mirror glaze colored. It will perfectly decorate your baked goods. A simple decoration will make the dessert look delicious.


Ingredients:
- sugar – 150 g;
- gelatin - pack;
- water-soluble dye – 5 ml;
- molasses – 150 ml;
- condensed milk – 100 ml;
- white chocolate – 150 g;
- water – 75 ml.
Preparation:
- Soak the gelatin according to the instructions on the package.
- Pour sugar into a saucepan and add water.
- Add molasses and stir.
- When the sugar has dissolved, pour in the gelatin.
- Place the chocolate, broken into pieces, into another pan and melt. You should use a quality product; a cheap type of chocolate will not work. The appearance of the glaze depends on the quality.
- When the chocolate mass has melted, pour in condensed milk. Next is the resulting syrup. Stir.
- Pour in the dye and beat with a blender.
- While whipping, you need to watch for bubbles, there should be few of them.
Caramel gloss
There is nothing more beautiful than a cake that has a mirror image. The glaze, evenly distributed over the delicacy, is mesmerizing and eye-catching. This dessert does not require special decoration.

Ingredients:
- gelatin – 10 g;
- instant coffee – 1 tbsp. spoon;
- sugar – 360 g;
- cream – 290 g;
- water – 290 g.
Preparation:
- Pour water into the pan, add sugar.
- Boil until the syrup acquires a caramel color.
- Boil the cream in a separate container and pour into the caramel. Mix.
- Boil for a couple of minutes.
- Gelatin must be soaked according to the recommendations indicated on the bag.
- Combine with caramel mass, the temperature of which is 60 degrees.
- Mix. Strain.
White cake icing
Ideal for mousse cake that has been in the freezer for at least 12 hours.


Ingredients:
- glucose – 150 g;
- white chocolate – 150 g;
- sugar – 150 g;
- gelatin – 10 g;
- water for gelatin – 60 ml;
- condensed milk – 100 ml;
- water – 75 ml.
Preparation:
- Pour water into the pan, add the amount of sugar, add glucose. Boil. The sugar should completely dissolve.
- Melt the chocolate separately and mix with condensed milk.
- Mix gelatin with water and leave. Melt. Pour into syrup. Mix.
- Pour into chocolate mixture. Beat. A blender will handle this task.
- Cool to 38 degrees so that the icing fits perfectly on the cake.
Honey based recipe
Many people are afraid to take on the task of preparing glaze, believing that it is a complicated process and that nothing will definitely work out. It is very easy to make glaze at home using simple ingredients.

Ingredients:
- sugar – 150 g;
- any dye can be used;
- condensed milk – 100 ml;
- water – 60 ml for gelatin;
- water – 135 ml;
- white chocolate – 150 g;
- liquid honey – 150 g;
- gelatin – 12 g.
Preparation:
- Pour gelatin into a container and add water. Let stand according to instructions.
- After this, you cannot melt or bring to a boil.
- Pour sugar into the pan.
- Pour in honey. Fill with water, you will need 75 ml.
- Boil.
- Melt the chocolate separately. You can't overheat.
- Pour chocolate into a tall container. On top - condensed milk.
- Pour in honey mixture.
- Stir.
- Pour in gelatin.
- Add some dye and stir.
- Turn on the blender, beat.
- Take a sieve. Spill the mass. This will help get rid of the bubbles.
Mousse cake with mirror glaze
This is a dessert that is delicate on the inside, delicious and elegant in appearance.

Ingredients:
For the strawberry confit:
- fresh strawberries – 260 g;
- water – 35 ml;
- lemon juice – 1 teaspoon;
- rum – 4 teaspoons;
- gelatin – half a pack;
- sugar – 80 g.
For the chocolate mousse:
- water – 60 ml;
- gelatin – 10 g;
- white chocolate – 85 g;
- sugar – 4 teaspoons;
- cream – 250 ml (first portion);
- vanilla sugar - packaging;
- cream – 150 ml (second portion);
- egg yolk – 2 pcs.
Glaze:
- dye – 1.5 g;
- white chocolate – 150 g;
- condensed milk – 100 ml;
- invert syrup – 150 ml;
- sugar – 150 g;
- gelatin – 10 g.
For the almond brownie:
- sugar – 90 g;
- white chocolate – 50 g;
- ground almonds – 30 g;
- butter – 90 g;
- dark chocolate – 50 g;
- egg – 2 pcs.;
- wheat flour – 50 g;
- dark chocolate – 90 g.
Preparation:
- First you need to make the brownies by melting the butter.
- Melt the chocolate separately.
- Pour sugar into a container. Pour in the oil. Mix.
- Add chocolate. Beat.
- Pour in the eggs.
- Add almonds, then flour. Stir.
- Pour into mold.
- Place in the oven. 160 degree mode.
- After cooking, cool.
- Now it's the turn of the confit. Place strawberries in a saucepan and add sugar. Cook.
- Soak the gelatin.
- After swelling, combine with strawberry mixture.
- Pour lemon juice.
- Add rum. Mix.
- Pour the mixture into a silicone mold and freeze.
- Prepare chocolate mousse. To do this, pour two types of sugar into the pan. Pour in the yolks.
- Grind.
- Heat the cream (the first portion), it should become hot.
- Pour over sugar. Boil until the mixture thickens.
- Soak the gelatin.
- Cool the thickened mass slightly. Place the gelatin, which has already swelled by this point.
- Place the chocolate pieces.
- Turn on the blender, beat.
- Separately, pour the second portion of cream into the container. Beat.
- Add to mixture. Mix.
- Use a pan larger than the brownie size. Place half of the mousse. To freeze.
Cake assembly:
- Place strawberry confit on top of the frozen mousse.
- Pour in some of the remaining mousse that has not been frozen.
- Cover the brownie.
- Fill the free space in the mold with the remaining mousse. Place in the freezer for 12 hours.
Glaze:
- Pour glucose syrup into the pan.
- Add sugar.
- Pour water. Mix. Boil.
- Pour the grated chocolate into the pan.
- Pour in condensed milk. Mix.
- Soak the gelatin in advance. When it swells, melt it.
- Pour into the pan.
- Add dye.
- Beat.
- Remove frozen pastry from pan.
- Place the cake on a wire rack.
- Place a baking sheet underneath.
- The glaze should have a temperature of 33 degrees.
- Drizzle over the cake.
- When the mass has set, decorate with sheet chocolate.
- Place on a plate.

- Bubbles can ruin the whole look. To ensure that there are few of them, you need to hold the blender correctly, the mass should be drawn into one stream. To do this, place the device at a slight angle. If it was not possible to beat correctly and a lot of bubbles have formed, you can remove them with a spoon or pass the mass through a sieve.
- The glaze does not completely harden on the treat. Therefore, it is not very convenient to cut; the mass drags behind the knife. To avoid cutting problems, you need to heat the knife and keep the cake cold.
- To make it easier to move the drenched treat onto the dish, use a spatula or kitchen spatula.
- For the glaze to be perfect, the temperature must be maintained. If the mass is cold, it will roll off the surface and the mirror effect will not work. If the heat is too high, you will get drips that will ruin the appearance of the cake. Always use a food thermometer to help you reach the desired temperature.
- The finished glaze can be stored in the refrigerator for several days. Before use, warm the composition to the desired temperature.
We live in a time of everything glossy and spectacular.
So why can’t dessert also catch the eye and amaze with its beauty, amaze with its palette and surprise aesthetes? And all the splendor of culinary excellence can come from cakes and pastries covered with mirror glaze. Where you can see your own reflection on dessert. Maybe this is where the name “mirror glaze”, reflecting the amazingness of desserts, came from.
It would seem how it is possible to create this with your own hands at home. And everything is quite simple if you familiarize yourself with the technological techniques and the formula of the “right” ingredients. So, let's start preparing a dessert, with million-dollar chic from the supposedly leading pastry chef of a chic and popular restaurant.
12 grams of gelatin (in classic recipes it is recommended to use sheet gelatin, but you can also use regular crystalline gelatin)
75 grams of boiled and cooled water
150 grams of granulated sugar (necessarily white, so as not to spoil the color of the coating)
150 grams of glucose syrup (it’s easier to make and use invert syrup, but we’ll see how to prepare it)
It is worth noting: Glucose syrup can be replaced not only with invert honey, but also with liquid honey (only a strong honey taste will be felt) or molasses.
100 grams (exactly grams - it’s better to measure on an electronic scale) condensed milk
4-5 drops food coloring
As you can see, the presented list of products for creating breathtaking beauty is absolutely affordable. Only the dye can not be found in every store, but rather in specialized retail outlets for confectioners. If you find a specialized culinary store, then buy it - it is more economical. It is also acceptable to use powdered food fat-soluble dyes for culinary creativity.
Please note: Every housewife knows how to make it with her own hands and at home, for example, from beets or spinach. So such wisdom is not suitable for mirror glossy glaze. If you can't find food coloring, try using dark chocolate (instead of white). It is possible to create a mirror glaze based on berry puree (some berries also give a bright color), see the recipe for which.
Inventory
tablespoon
hob
electronic balance
microwave
container with lid
How to make glossy cake frosting
Let's start with gelatin: soak it in ice water and leave it to swell.
If it is more convenient for you to work with crystalline gelatin, then it needs to be soaked in a ratio of 1 to 6, that is, for 12 grams of gelatin crystals we use 72 grams of water.
It is better to measure all volumes on electronic scales.

In a separate container that can be used over an open fire, put granulated sugar, pour boiled water and our own prepared.
Bring the sugar mixture to a boil and complete dissolution of the granulated sugar.

Place the chocolate, broken into pieces, into another container. We need melted chocolate, so we place the bowl in a water bath or put it in the microwave, for 15 seconds, no more. Then you take out the container, mix the mass, and put it back for a few seconds.
It is worth noting: It is important not to let the chocolate boil, otherwise it will curdle and lose quality.

Pour condensed milk over the melted chocolate. Mix the mixture until smooth.

Let's combine the two resulting compositions: condensed chocolate and sugar syrup. Mix everything.
You can do everything in a glass with a blender - it’s faster, although difficult.

While the composition is hot, add soaked leaf gelatin into it.
If crystalline gelatin was used, then pour it into the mixture in the same way.

Let's add a few drops of food coloring to the future beauty.

We begin to actively work with the blender at minimum speed, trying to maintain an angle of 45°. The blender needs to be immersed in the mixture as much as possible, and not lifted, so that bubbles form on the surface.

I think that for those who are faced with the preparation of mirror glaze for the first time, bubbles will definitely appear on the surface.

You can correct the bubbly fact very simply - strain the composition.

That's all! We did it! Mirror glaze is ready!
Pour it into a container convenient for use, cover with a lid and put it in the refrigerator for storage until the cake is baked.
Note: You can store the glossy glaze in a closed container in the refrigerator for several days (up to a month). Before use, you need to warm it up a little (to about 35°) to restore its fluidity.
We cover our dessert with glaze and put it in the refrigerator to harden. Let’s find out exactly how to properly coat the dessert.

If sweets were given an Academy Award, mousse cakes would no doubt garner an impressive collection of gold-plated statuettes. A juicy sponge cake, a cloud of airy mousse with a delicious surprise in the form of a crunchy crumble or sweet confrey inside, and on top of all this splendor - a shiny mirror glaze or, if a professional with a culinary spray gun in hand gets to work, fleecy velor. A real masterpiece of taste! Believe me, such a cake is worth spending time, effort, and some money on its preparation.
Mousse perfection
While the whole world enthusiastically devoured Napoleon and Sacher cakes coated with cream on holidays or savored the delicate Tiramisu, European confectioners worked hard, coming up with something special to amaze the public, satiated with classic desserts. And they didn’t waste their time in vain, since through their efforts such a miracle of culinary thought was born as a mousse cake, which in one fell swoop broke all stereotypes about what this delicacy should look like.
First of all, a mousse cake has only one cake layer, which serves as the basis for the entire dessert. This role is usually played by the “king of baking” sponge cake: classic, vanilla, honey, chiffon, marzipan. It happens that at the base of the delicacy there is a chocolate brownie, and an exquisite nutty dacquoise cake, crispy on the outside and tender on the inside, and almond Mona Lisa, and even shortbread dough.
Above the sponge cake rises a lush head of mousse - fruit, berry, nut, creamy, chocolate or coffee. And inside awaits the eater a filling of wafer crumbs, nuts, chocolate, custard or fruit and berry puree thickened with gelatin. It all depends on the confectioner’s intentions.
The crust, filling and mousse are the “three pillars” of the famous dessert
However, mousse cakes are renowned not only for their exquisite flavor and texture combinations, but also for their spectacular appearance, so none of them can be considered complete without an impressive coating. We won’t talk about “velor” desserts this time; they can only be made with the help of special devices, which makes no sense to shell out for if you are not a professional chef. But let’s mention the mirror glaze, which turns the dessert into either a huge Christmas tree decoration or an exquisite candy. She's definitely worth it.
Mousse cake is a difficult delicacy. Depending on the recipe, its preparation can take from 2–3 hours to a day (keep in mind the fact that most mousse cakes take 8–12 hours to reach condition in the refrigerator). Without sufficient dexterity, it is difficult to master such work in one sitting, so beginners can take advantage of the experience of the author of the article. Since the eternal workload, coupled with equally eternal laziness and slight sloppiness, did not allow the creator of this opus to devote several hours in a row to baking, the idea came to break the preparation of the cake into stages. So on the first day the sponge cake was born, on the second the fruit confit for the filling was prepared and frozen, on the third the mousse was whipped and the cake was assembled, and on the fourth it was time for the glaze. As a result, the dessert reached the table on time, although not without some hiccups.
Gallery of mousse cakes with mirror glaze
 Two cake layers is no longer a classic, but it is also a completely acceptable option.
  If you purchase a spectacular shape, the cake will turn out even more beautiful.
  Confry, coulis, compote - there are a lot of filling options
  Mousse cakes look impressive
  Design plays a significant role
  Do you agree, it looks delicious?
  It’s no wonder that mousse desserts are gaining popularity
  This delicacy will be a credit to any housewife.
  A real work of art!
What is mousse and how is it prepared?
Although the cake is nominally the base of the dessert, the exponentially growing popularity of cakes is based on a completely different component. Namely, on a sweet mousse, which is churned on the basis of heavy cream, curd cheese or custard. It almost always contains gelatin, thanks to which the sweet cloud gains elasticity and easily holds its given shape, without losing one of its main qualities - lightness.
The exact composition of the mousse depends on the preferences of the cook or the eaters for whom he is creating his delicacy, but it is not recommended to select ingredients at random. Do not forget that there will be a filling inside the mousse, which should be combined with it to taste, so it is better for inexperienced cooks not to experiment in this matter, but to follow the recipe exactly.
Whipping the mousse is the penultimate step in cake preparation, after which the sweet masterpiece is assembled into a mold and sent to the refrigerator or freezer before moving on to the final touch, that is, applying a mirror coating (glaze).
Glamorous glaze
If mirror glaze is not the most significant flavor component of a mousse cake, then its role in the design of the dessert is difficult to overestimate. It is she who gives the delicacy that very impressive look that will make the guests collectively let out a sigh of admiration.

Sometimes a second layer of base glaze is applied on top of the first layer, which allows you to create spectacular streaks on the surface of the cake.
Mirror glaze differs from the glaze familiar to cooks, which usually covers homemade baked goods, in several ways:
- it is truly mirror-like, that is, glossy and shiny, reminiscent of molten glass;
- it requires a certain heating temperature, which most chefs recommend not trying to determine by eye, but using a culinary thermometer;
- it is not applied with a spatula or spatula, but is carefully poured onto the top of the cake, having previously placed it on a wire rack with a base.
As a rule, mirror glaze includes glucose (invert) syrup or molasses. And also water, condensed milk, sugar, chocolate, cocoa, cream, vanilla, coloring and anything else the cook thinks of adding to it.
Video: how to prepare invert syrup for glazing
Recipes for making mousse cakes
- Silicone cake mold. You can get by without a silicone one, it will just be easier to remove the delicacy prepared for glazing from this one.
- Cake ring or smaller sponge tin. Don't forget, it will have to be completely hidden under the mousse.
- Small shaped molds, like those in which you freeze ice, for the filling.
- Mixer or blender (it is advisable to have both on hand, since a mixer is convenient for whipping mousse, and an immersion blender will be very useful when preparing icing).
- A spatula or, at worst, a wide flat knife to distribute the glaze over the surface of the cake and easily move the cake from place to place.
- Fighting spirit and smile.
As mentioned above, professionals use a special thermometer to create mirror glaze. If you have one, great. If not, use your own discretion. The author of this article, for example, decided that it’s not worth spending money on something that you don’t plan to use in the future. Perhaps this is precisely why, or perhaps because the hands were not quite straight (this option cannot be ruled out either), the glaze turned out to be far from being as smooth and mirror-like as the author imagined in his dreams. Which, however, did not in any way affect the taste of the cake, so decide for yourself.

Silicone molds make the task much easier
- classic cake with berries;
- “sunny” pumpkin cake;
- “Three Chocolates” cake;
- and just chocolate cake with nuts.
But in order not to re-describe the preparation stages common to all mousse cakes each time, we divided the article into blocks:
- baking biscuits;
- preparing the filling;
- preparing mousse;
- glaze recipe;
- assembling the cake.
Let's get started?
Baking a biscuit
Although mousse-based desserts saw the light of day in the 18th-19th centuries of the last millennium, mousse cakes are a relatively young delicacy, so it’s too early to talk about classics in the traditional sense. Any mousse cake that has three parts in its composition can be called conventionally classic: sponge cake, creamy mousse and berry filling. You will find just such a recipe below. But if you want to try a cake with a crunchy nut layer inside or make it out of three types of mousse, you will have that opportunity.
Honey cake for a classic cake with berries
You will need:
- wheat flour - 150–160 g;
- egg - 1 pc.;
- butter - 7–8 g;
- honey - 20–25 g;
- sugar - 65 g;
- soda - 1\2 tsp.
Preparation.
- Combine honey, butter and sugar in a ladle or saucepan and heat over medium heat until the sugar dissolves and the mass becomes homogeneous. Don't be alarmed if the mixture darkens a little during cooking, this is normal.

Once heated, the mixture will darken slightly.
- Remove the saucepan from the heat, add baking soda and stir vigorously. There is no need to extinguish it with vinegar or lemon; high temperature and honey will do this for you, as will be indicated by the foam appearing in the saucepan and the mass increasing in volume.

The mass will begin to bubble and increase in size.
- Beat in the eggs, gradually add flour and knead the dough. Be careful here: you may need a little less flour than indicated in the recipe, so add it in parts and watch the consistency of the dough. As soon as it becomes elastic, the goal is achieved.

After adding flour the dough lightened
- Roll out the dough on a floured table into a layer 5–7 mm thick.

The cake requires a crust 1–2 cm thick.
- Place on a baking tray lined with baking paper, prick with a fork in several places and bake in an oven preheated to 180° for 5-10 minutes.

The dough, pricked with a fork, will not puff up during baking.
- Let the cake cool slightly and then cut the cake to fit the pan.

The cake is ready!
If you manage to find buckwheat or linden honey in the store - or better yet, in the market - the aroma of the baked goods will be more intense. You can opt for chestnut, but it tends to impart a slight tartness to the dough, which not everyone will like.
Soft sponge cake for pumpkin cake
You will need:
- wheat flour - 50 g;
- sugar - 40 g;
- eggs - 2 pcs.;
- baking powder - 1\2 tsp;
- butter.
Preparation.
- Arm yourself with a mixer and beat the eggs with sugar. The mass should increase in volume by about 2-3 times.

Use a mixer, it's faster
- Sift the flour with baking powder and add it to the egg mixture, kneading the dough with a spatula from bottom to top.

Sifted flour will add airiness to the dough
- Line a baking pan with parchment paper and grease the bottom and sides with butter.

Nothing will burn or stick with parchment.
- Pour the dough into the mold and place in an oven preheated to 180° for a quarter of an hour.

The biscuit is ready if there is no dough left on it after pricking it with a toothpick.
- Let the finished biscuit cool thoroughly and remove it from the mold.

If the cake is too puffy, cut it lengthwise and freeze one half.
Savoiardi for Three Chocolates Cake
It seems that this cake just begs for a chocolate or coffee base. But there will be plenty of chocolate in this dessert, so we suggest you prepare something different: a sponge cake based on the recipe for savoiardi dough - the same one from which soft, melt-on-the-tongue cookies for Tiramisu are baked.
You will need:
- wheat flour - 50 g;
- egg - 2 pcs.;
- sugar - 50 g;
- powdered sugar - 30 g;
- Baileys liqueur - 40 ml.
Preparation:
- Break the eggs and separate the whites from the yolks. Divide the sugar into two parts, adding one to the yolks and the other to the whites. Beat both: whites - into a stiff foam, yolks - until the sugar grains are completely dissolved.

Both the white and the yolk need to be beaten thoroughly
- Combine both masses, gently mixing them with a spatula.

Mix with a spatula from top to bottom
- Without stopping using the spatula, add the sifted flour into the mixture.

Add flour gradually
- Prepare a baking pan: line it with parchment and grease the sides with butter.

Rub a piece of butter well around the sides of the pan.
- Place the dough in a plastic bag with the tip cut off (in case you don't have a piping bag with tips) and carefully, working from the center to the edges, release the dough into the mold in a spiral. Sprinkle it with powdered sugar.

The dough can be transferred with a spoon, but it’s more convenient with a bag
- Bake the sponge cake in an oven preheated to 180° for 10–15 minutes, then let cool and soak in liqueur.

If you plan to serve the cake to children, replace the liqueur with cocoa
Video: dacquoise for chocolate cake with nuts
Preparing the filling
The most common filling for mousse cake is probably berry and fruit cremeux (cremeux) and confrey. We suggest you prepare them. Sea buckthorn and orange go well with pumpkin mousse, and almost any berry goes well with classic creamy mousse, so you can choose according to your taste. Well, for the chocolate cake, since it was decided to put dacquoise at its base, we will prepare a crispy nut parlin. Only the “Three Chocolates” cake will be left without filling - its three multi-colored layers will already delight you with a rich palette of flavors.
Berry cream
You will need:
- fresh or frozen berries - pitted cherries, raspberries, strawberries, lingonberries, blueberries - 130 g;
- yolks - 2 pcs.;
- gelatin - 5 g;
- white chocolate, broken into small pieces - 40 g;
- sugar - 2 tbsp. l. for sweet berries and 3–4 for sour ones.
Preparation.
- Puree the berries using a blender. If you use raspberries, rub them through a sieve to get rid of the seeds, which will ruin the consistency of the dessert and get stuck in your teeth.

Choose berries according to your taste
- Soak the gelatin according to the instructions on the package, let it swell and add to the chocolate.

Chocolate drops specially designed for melting are very convenient
- Beat the yolks with sugar until white.

Turn mixer to high speed
- Add berry puree to the yolks, mix well and heat over low heat until thickened, constantly whisking vigorously with a fork or whisk.

For inexperienced housewives, it is better to keep the puree in a water bath - this way it will definitely not burn
- Pour the thickened berry mass into a container where gelatin and chocolate are waiting in the wings, let them stand for 1-2 minutes, beat everything with a blender and cool to room temperature.

Chocolate broken into small pieces will quickly melt into hot puree.
- Pour the cremeux into the cling film-lined cake ring to create a thin layer of filling. Or do it differently and put the berry mixture into molds - this way you will get figures that look good in the mousse. In both cases, the container with the berry mass will need to be placed in the freezer.

Today in stores you can find forms for any occasion.
An excellent addition to the cream would be the confrey from the video recipe below. In this case, first make the confry, freeze it in a sponge tin, then pour the cream on top and put it back in the freezer. You will get a two-layer berry filling. In addition, confries can also be frozen in ice cube trays.
Video: cherry confrey
Crispy nut layer
You will need:
- milk chocolate - 100 g;
- butter - 1 tbsp. l.;
- puffed rice - 80 g;
- almond and hazelnut parline - 175 g.
Preparation.

Video: how to make parline
Whisk the mousse
Let's move on to the sweet “zest” of the sensational cakes - airy mousses that will crown your dessert. And since mousse, as a rule, is made according to the same scheme, we will give the recipe for its preparation in the form of a general algorithm, so as not to describe the same sequence of actions four times. Uncover your mixers!
So, you will need...
For a classic cake:
- milk - 230 ml;
- cream 33% fat - 400 ml;
- white chocolate - 320 g;
- gelatin - 12 g;
- vanilla extract (can be replaced with cinnamon) - to taste.
For the pumpkin cake:
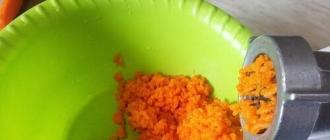
- pulp of oven-baked and pureed pumpkin - 350–400 g;
- cream 33% fat - 500 ml;
- orange juice - 50–70 ml;
- powdered sugar - 125 g;
- gelatin - 25 g.
For the Three Chocolates cake:
- dark bitter chocolate - 200 g;
- milk chocolate - 200 g;
- white chocolate - 200 g;
- milk - 120 ml;
- cream 33% fat - 900 ml;
- butter - 90 g;
- gelatin - 30 g.
For the chocolate mousse:
- dark chocolate - 150 g;
- milk - 220 ml;
- cream 33% fat - 450 ml;
- gelatin - 15 g;
- vanilla extract - to taste.
Preparation.
- First, soak the gelatin as directed on the package.

Gelatin should swell
- Next, prepare the base for the mousse:

- Whip the pre-cooled cream to stiff peaks and stir it in parts into the prepared mousse base, cooled to a temperature of 35–40°. This must be done very carefully, moving the spatula from top to bottom, but efficiently - you should get a homogeneous mass without streaks or inclusions.

No sudden movements! The cream should not fall off
Once the mousse is ready, you can proceed to assembling the cake.
Dessert assembly procedure
There's a sponge cake on the table, confry and parlin in the freezer, and you've just shaken the last drops of whipped mousse off your spatula... It's time to move on to the most interesting and important stage: assembling scattered sweet pieces into a single appetizing masterpiece. Moreover, you will not do this in the traditional way, starting with the base cake and ending with the top, but exactly the opposite, because mousse cakes are placed “upside down” in the mold.
- Place part of the mousse on the bottom of the mold - about half - and put it in the freezer for 5-7 minutes so that the mousse begins to set.

You will only need half the mousse at first.
- Return the pan to the table, spread the prepared filling over the slightly frozen mousse: berry confrey and cremeux - for a classic or pumpkin cake; parline - for chocolate.

If you froze the confrey in small molds, spread it over the surface of the mousse in a random order.
- Pour the remaining mousse over the filling.

The cake is almost ready
- Place the sponge cake on top, lightly drowning it in the mousse.

The sponge cake should neither protrude too much from the mousse nor sink into it.
- Using a wide knife or spatula, remove any remaining mousse that has protruded from the edges, cover the pan with cling film and refrigerate for 8–12 hours. After this, the cake can be removed from the mold and turned over with the sponge side down. That's it, you can proceed to the final step - decorating the dessert with mirror glaze.

All that remains is to decorate
If we are talking about the Three Chocolates cake, the assembly order remains the same. You simply skip the filling part and sequentially pour all three layers of mousse into the mold: white chocolate, milk chocolate and dark. Place each new layer in the freezer for 5-10 minutes to allow it to harden.
Two glaze options
The cake is almost ready, all that remains is to decide what glaze you will cover it with. We offer two options to choose from. The first recipe is a classic one, the same one used by professional chefs. The second glaze cannot rightfully be called a mirror glaze, but if you don’t have invert syrup on hand and don’t want to cook it, you can use the “budget” variation of glaze.
Video: universal recipe for mirror glaze
A simplified method of preparing glaze
You will need:
- water - 100 ml;
- high fat cream - 100 g;
- cocoa - 60 g;
- sugar - 175 g;
- gelatin - 12 g.
Preparation.
- Soak gelatin according to package instructions.

Gelatin will add shine and viscosity to the glaze.
- Pour sugar into water and heat over medium heat until the grains dissolve.

While the water boils, the sugar will have time to dissolve
- Let the syrup boil, reduce the heat and simmer for another 5-8 minutes.

The syrup will begin to thicken slightly
- Add cocoa and cream, stir.

Cocoa will give your frosting the aroma and taste of chocolate.
- Remove the saucepan with the syrup from the heat and add the gelatin.

The glaze without invert syrup is not as mirror-like, but still delicious
Video: coffee mousse cake Heart
Methods for decorating mousse cakes - photo gallery
 Why not decorate the cake with marshmallows?
  Figured chocolates will come in handy
  And here we used two layers of glaze
  Dried berries? Why not?
  And a real artist worked here!
  Simple and sweet
  Romantic motifs are what you need for a birthday cake
  Makes me think of summer, right?
  For fantasy lovers
  You can buy chocolate decorative elements or make them yourself
  Sponge cake - “sponge cake” - a newfangled way to decorate cakes
Video: how to decorate a mousse cake
Mousse desserts sometimes look so that inexperienced housewives give up: is it really possible to prepare such beauty on your own?! It’s possible, don’t even doubt it! To do this, you don’t need to complete a culinary course or look for special ingredients in stores. All it takes is your ardent desire and a little diligence, and the mousse cake will certainly satisfy you, so don’t be afraid to experiment.
×- Gelatin - 12 g
- Glucose (or invert) syrup - 150 g
- Water - 75 g
- Sugar - 150 g
- Chocolate - 150 g
- Condensed milk - 100 g
- Dye
Close Printing ingredients
Mirror glaze- the best recipe in RuNet, a recipe that is guaranteed to work!
Mirror glaze- an impressive glossy coating for modern cakes and pastries. It is most often used in mousse desserts, but sometimes it is also used to cover traditional cakes, although in this case, as a rule, not completely, but only the top, so that the glaze drips down in beautiful drips.
excited my mind for quite a long time until I learned how to make it :) I always imagined that these amazing cakes were nothing more than photoshop! Well, an edible surface cannot be so polished, so reflective, so perfect, I thought! It turns out it can! And most importantly, this recipe turned out right the first time!
The simplest ingredients are used for its preparation. But you can’t do without a culinary thermometer: the glaze has a so-called working temperature at which it is poured onto a cake or pastries. This temperature is 30-35 degrees, on average 32. And it is very important to observe it, because plus a few degrees - and the icing will drain too much, leaving gaps, and minus - it will set before it has time to cover the cake. And since icing is the final stage in making a cake, it can easily negate all previous efforts. If you ignore the rules, of course. And the temperature of the cake itself is also very important: it must be well frozen and you need to take it out of the freezer immediately before pouring the icing.
IMPORTANT: if the glaze is used for drips on the cake, its temperature should be lower, in my experience, no more than 30, about 28 degrees. Otherwise, the drips will reach the very bottom of the cake and puddles will form on the base. It doesn't look very good.
Well, here is the recipe! Step by step with photos.
To prepare colored mirror glaze, we will need:
- gelatin (I'll show you how to use powdered gelatin, but you can also use sheet gelatin),
- glucose syrup - don’t be alarmed, it can be easily replaced with molasses or liquid honey, but in the latter case the honey aroma and taste will be felt,
- White chocolate,
- condensed milk,
- sugar,
- and dye.
The products, as you can see, are affordable, and everything except the dye can be bought at any supermarket. Dyes are sold in specialized stores for confectioners. I will be using Americolor gel coloring in this recipe. It is high quality and economical. You can also use powdered fat-soluble food coloring. If you need a snow-white glaze, titanium dioxide will help (looks exactly like tooth powder :)). Natural dyes a la beet juice or spinach juice are not suitable for mirror glaze, and if you don’t have any dye, there is only one way out: try making a glaze simply based on dark chocolate. And recently I discovered a recipe for myself, depending on the berries, it can also turn out bright, but that’s a completely different story.

So, we seem to have decided on the ingredients. Go!
Pour 12 g of gelatin into 60 g of cold water.

Put 150 g of sugar in a saucepan, fill it with 75 g of water and 150 g. This whole thing looks amazing! :)

We put it on fire.

Bring to a boil and the sugar is completely dissolved.

Melt 150 g of chocolate in a water bath or in the microwave. It is important not to overheat, otherwise the chocolate will curdle and be spoiled. Construct the water bath so that the boiling water does not touch the bottom of the saucepan with chocolate. In general, immediately after boiling, it is better to turn off the heat and, constantly stirring the chocolate pieces, wait until they have completely melted. If you use a microwave, place the container with chocolate in it for 15 seconds, take it out, stir, reheat, etc., until all the chocolate has melted.

Pour the chocolate into a tall blender glass. In principle, the glaze can be made without a blender and, accordingly, a glass from it, but with them it is faster and more convenient.

Pour 100 g of condensed milk onto the chocolate. Needless to say that milk must be of high quality? Its taste directly affects the taste of the finished glaze, so it is advisable to take condensed milk without vegetable components. The real one is the one with only milk and sugar.

Pour hot invert syrup onto the chocolate-condensed milk mixture.

This is how something turns out. Future beauty, by the way! :)

We are trying to mix. This will be difficult.

Pour in the dissolved gelatin in a thin stream and mix. Like chocolate, it is important not to overheat gelatin: at temperatures above 70 degrees, it loses its gelling properties.

Add dye. In the case of gel, a few drops are enough.

And again we try to mix. The photo shows that the mass does not want to become perfectly smooth and uniform, as it should be! There are, of course, craftsmen who can make do with a spoon...

... but that's not me :) So let the blender help me! You should hold it at an angle of 45 degrees and try not to lift it above the surface of the glaze to avoid the appearance of bubbles.

However, no matter how hard I try, they still always form. Look at them, they hatched.

But I know how to fix it - pass the glaze through a fine sieve!

Actually, our colored mirror glaze ready!
The glaze from this amount of products is enough to cover a mousse cake with a diameter of 20 cm. For drips, this amount is a lot; for an average cake, in my opinion, a third will be enough. But this is a matter of skill and taste.
The glaze can be prepared several days in advance and put in the refrigerator, and before use, heat it in a water bath or in the microwave (15 seconds at a time, stir, and again in the microwave), bring to the desired temperature and work!
Of course, this is not the only recipe for colored mirror glaze, but it seems to be the most common.
Prepare, try, share the results!
The mirror glaze, like many other things, was inspired by the wonderful Olya, I never tire of thanking her! :)
Elegant in appearance, tasty and tender inside - this is just a brief description of the Mousse Cake with mirror glaze, which is not an easy baking recipe.
I want to introduce you to my recipe for beginners with a video on how to make a delicious Mousse Cake with mirror glaze. To prepare it you will need to stock up on enough time and patience. But it's worth it.
Our cake will consist of a brownie base, white and blueberry mousses, and colored mirror glaze.

For this we need:
- 100 g sugar;
- a pinch of salt;
- 1 egg;
- 100 g flour;
- one teaspoon of baking powder;
- 50 g butter;
- vanilla on the tip of a knife
Preparation
- Melt the butter and dissolve the sugar in it.
- Beat in the egg, add vanilla and a pinch of salt.
- Beat until white and light foam.
- Mix flour with cocoa and baking powder.
- Gradually add the dry and egg mixtures with a spoon.
- Mix until smooth and viscous.
- Preheat the oven to 160°.
- Pour the dough into a greased mold (mine is 21 centimeters).
- Bake for 25 minutes and check the degree of readiness with a wooden skewer or toothpick. If the biscuit is damp, bake for another 10 minutes.
- Place the finished cake on a wire rack and cool.
The base can also be shortbread. You can bake it yourself or make it from shortbread cookies.
Shortbread base

Ingredients:
- 50 g butter;
- 300 g shortbread cookies;
- 50 g condensed milk.
Preparation
- To do this, take the cookies and crush them with your hands or a blender into crumbs.
- Beat soft butter and condensed milk.
- Combine crumbs and cream.
- We form a dense cake, 2 cm smaller than the diameter of the future cake.
- Place in the freezer until completely frozen.
While the biscuit is cooling, let's prepare the mousse.
White mousse
We will prepare the mousse in two colors: white and blueberry. You can make just one color or replace the blueberries with other berries.

Required list of products:
- 20 g powdered gelatin;
- 2 squirrels;
- 120 ml. water;
- 240 g soft fat cottage cheese;
- 200 ml. 33% cream;
- 1 1/2 bars of white chocolate;
- 50 g powdered sugar;
- vanilla on the tip of a knife.
Preparation
- Pour gelatin with water and leave to swell for 20 minutes.
- We put it in a steam bath and, heating it, completely dissolve it.
- Whip the cream into a thick, stable foam.
- We do the same with the proteins, mixing them with powdered sugar and vanilla.
- Melt the chocolate with a couple of tablespoons of cream.
- Mix cottage cheese with gelatin and chocolate. Whisk.
- Spread the cream on the curd-gelatin paste.
- Gently mix with a spatula, combining everything into a homogeneous mass.
You can replace white chocolate with black. This will make chocolate mousse. It can be used in Three Chocolate Cake.
Blueberry mousse

We need to take:
- 20 g gelatin;
- 50 g sugar;
- 120 ml. water;
- 1 heaped teaspoon of cornstarch;
- 2 yolks;
- 100 g blueberries;
- 200 ml. 33% cream.
Preparation
- Melt gelatin in the same way as for white mousse.
- Grind the blueberries in a blender and grind through a sieve into a puree without seeds or skin.
- Grind the yolks with sugar and starch until white.
- Bring the cream to a boil.
- Pour into the yolks and mix.
- Place on low heat. Cook, stirring, until thickened.
- Whip the cream.
- Pour gelatin and blueberry puree into the custard mixture. Beat well.
- Pour cream into the cooled blueberry mixture.
- Mix everything smoothly with a spatula.
Colored mirror glaze (glaze)
The glaze contains molasses or invert syrup. They are interchangeable. I’ll tell you how to make this syrup yourself below.

We will need:
- 100 g condensed milk;
- 75 + 60 ml. water;
- 150 g sugar;
- 150 g non-porous white chocolate;
- 150 g molasses/invert syrup;
- 10 g or 2 teaspoons without a slide of gelatin;
- food coloring (if necessary).
Preparation
- Pour gelatin (I use powder) with water (60 ml) and leave for 20 minutes. Warm it slightly and dissolve it completely.
- Mix water (75 ml), sugar and syrup. Bring to a boil. The sugar crystals should completely disappear.
- Pour the sweet mixture over broken chocolate and condensed milk.
- Mix well until the chocolate melts.
- Add syrup and dye (I take gel and add it until the desired color is obtained). It is possible without dye. Then the glaze will be a delicate, translucent shade.
- Mix thoroughly (I do this using an immersion blender, tilting it slightly to one side).
- Strain through a fine sieve.
- Set aside the syrup to allow excess air to escape.
- If air bubbles or light foam appears on the surface, it must be removed.
- We place the film tightly on the glaze, protecting it from weathering, excess moisture and crumbs.
- When pouring, the temperature should be 30°.
Preparing invert syrup

Ingredients
- 3 tbsp. spoons of warm water;
- 1/4 teaspoon of citric acid;
- 150 g sugar;
- 1/4 teaspoon of soda.
Preparation
- Pour sugar and citric acid into a thick bowl (I use aluminum).
- Pour warm water, soaking the sugar with it.
- Place on the lowest heat. If there is a diffuser, then place the bowl on it. Cook, stirring, until light yellow and medium-sized bubbles.
- Cool the syrup to about 70°.
- Add soda and beat well with a blender or mixer at full speed for about three minutes.
- It will begin to foam strongly and turn white and matte. After cooling, the bubbles will go away and it will become a nice transparent yellow-straw color. We keep the finished syrup in the refrigerator for several hours.
Instead of colored glaze, you can make chocolate glaze.
Chocolate glaze

You need to take:
- 75 + 60 ml. water;
- 200 g sugar;
- 2 tbsp. level spoons of dry cocoa;
- 40 ml. (2 tbsp) cream;
- 100 g molasses/invert syrup;
- 10 g or 2 teaspoons of powdered gelatin;
- 1/4 bar of dark chocolate.
Preparation
- Prepare gelatin and invert syrup as indicated in the recipe for colored glaze.
- Pour gelatin and hot syrup over broken chocolate, add cocoa and cream.
- Mix until smooth with a blender.
- We hit the bottom of the bowl with glaze on the table several times and twist it in different directions. This will allow air bubbles to come out faster.
- Cover with film and cool to 37°.
- If, before pouring the glaze over the finished cake, it has cooled down more than necessary, heat it either in a water bath or place it in a bowl of hot water.
Assembling the cake
- Place the mold with a diameter of 21 cm on a perfectly flat surface. You can use a plastic board for this.
- We wrap the sides of the form with a strip of thin plastic, larger in height than the form.
- Pour in the blueberry mousse and place in the refrigerator for two hours to allow the gelatin to set.
- Pour white mousse onto the frozen first layer.
- We reduce the cake by two centimeters by cutting it in a circle (I do this using a pan lid).
- Place the sponge cake on top of the mousse and, pressing lightly, press it into the middle. You can leave a small part of the white mousse so as not to drown the cake, then filling the void between it and the mold.
- Place in the freezer for at least three hours until completely frozen.
You can make cakes of any shape using this method.
Pour in the glaze
- We take out the completely frozen cake.
- We release it from the form.
- Place the biscuit part on the grill. Place a large dish or tray under the grill.
- Pour the icing onto the surface of the cake, working in a circular motion towards the edges.
- Leave for 5 minutes to allow excess glaze to drain off.
- Carefully remove any dangling droplets from below and transfer the cake from the wire rack to a plate.
- Leftover frosting can be collected and kept in the refrigerator or frozen.
- You can cover the unevenness of the glaze at the bottom of the cake with the help of laid out cookies, fruits or cream patterns.
- Place the cake in the refrigerator for several hours.
How to decorate a mousse cake
- The main decoration of the mousse cake is the mirror surface itself.
- The cake can be filled with icing of different colors, and the seam between them can be disguised with a pattern of cream or beautifully laid out fruits and sprinkled with confectionery beads.
- You can decorate a finished one-color cake in the same way.
- This video will help you understand the technology of the Mousse Cake recipe with mirror glaze in more detail: